Luxury isn’t just a large home anymore

smart-home.jpg

Luxury isn’t just a large home It takes more these days than just a large home, to define the true meaning of luxury.  And Luxury homes are popping up all over the Los Angeles remodel scene. The word luxury brings to mind plenty of conveniences such as, pools, bathrooms with built in towel warmers, in-home gyms that include the newest equipment, backyard tennis courts, game rooms, and fully-stocked kitchens with warming drawers and wine cellars? But what are the items that luxury home buyers want the most?  What is a luxury homebuyer looking for when shopping for their new abode? How can you make your home as luxurious as possible during your next remodel?

cream-wallpaper-look-bathroom-tiles-700x476

Here are the top luxuries people are looking for to ensure you aren’t adding amenities that no one is looking at.

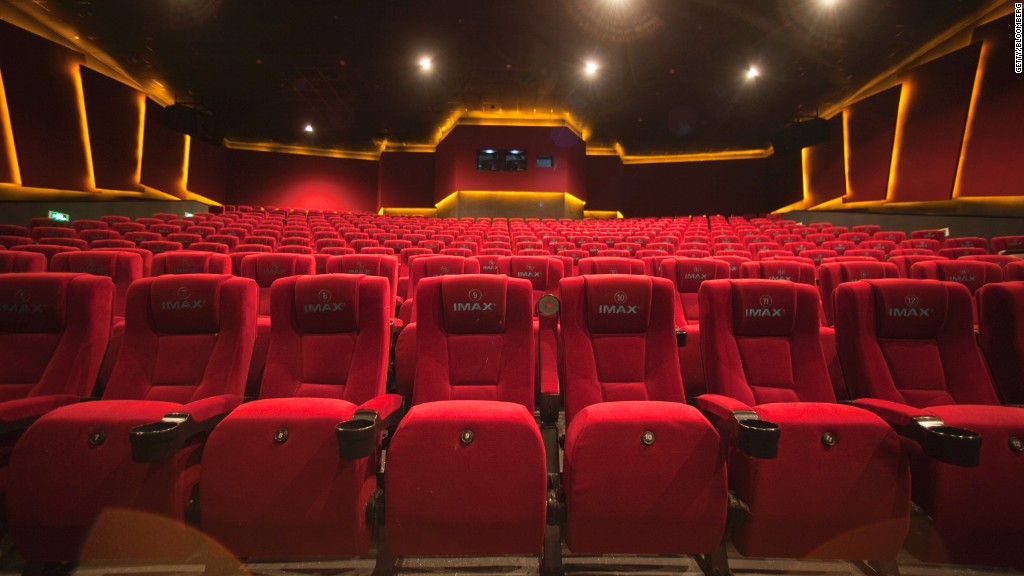
A home theater is great, but luxury home buyers are looking for more than just a room with a large screen and comfy seats. You will need to step it up a notch and get yourself an IMAX home theater if you want to wow the crowd, the luxury crowd that is. Watching Hollywood block busters from the comfort of your home is now possible, with a hefty price tag that is. IMAX will bring the best theater to your door for $3 million dollars and change. If this isn’t something you think you have prepared in your remodel budget, that’s ok, wait a few years and the price may decrease. Until then we can continue to shell out big bucks for the movie theater or wait until it shows up at your local Redbox.

imax

Speaking about technology, the luxury amenity next on our list is a home that is fully managed, monitored and controlled by a smart phone or tablet. Hence the name: “smart home.” Control the temperature, light setting, security system, door and window locks, sound system, t.v’s, and more, with the touch of one button from where ever you are. The digital world is taking over and people want technology improved homes. Think about technology and innovations before you start your next luxury project. Luxury is all about making life easier, better and being able to do things faster. Such luxury means you do not have to open or close your curtains. That’s right; homes are becoming equipped with motorized blackout curtains or shades. Why? Because this is what home owners think will make their life easier. I guess it seems nice to have your curtains set to close or open at a certain time, or pressing a button to close the shades when the afternoon glare is obscuring your t.v show rather than getting up to do it yourself. Have your smart phone control your curtains too while you are at it.

sh13_06-kitchen-EPP5032_4x3_lg

So you have guessed it, luxury comes with a cost. Keep in mind that these are the top luxury amenities, but there are thousands that are affordable and worth the renovation.

Old kitchens are warned: Your days are done!

Old kitchens are warned: Your days are done! BEFORE

Our Burbank kitchen remodel is warning to all old kitchens, your days are numbered! Spazio LA is coming for you.

Our client had grown tired of their outdated kitchen, and dreamt of nothing more than a space that complimented their style and a place to entertain.

Problem areas of the existing kitchen: The dark and dreary color scheme of their kitchen made the space seem more small and compact than it was already. Lacking cabinet & storage space floating shelves housed appliances and décor. These problem areas our client hoped to fix with the new space we were going to deliver.

Remodel must haves:

1. More space to entertain – build Custom Island with seating and built-in appliances.

2. More cabinet & storage space – replace floating shelves with cabinets and pantry.

3. Upgraded appliances- add built in appliances, energy saving appliances.

4. Eco friendly materials – environmentally friendly flooring, light color flooring.

Have you made your remodel must have list yet?

DSC_0049 (1)

Demo and construction gets under way as we plan to surprise our clients with a kitchen straight out of a magazine.


DSC_0043 (1)


We gutted everything! From the floating shelves, sink, counters tops, cabinets, and range – we emptied the entire kitchen space.

Framing for the new skylight is in the works! Skylights are a great way to lower your energy bills and impress your family. And this skylight will be a show stopper when we are finished.

It may not look like much while we are in the midst of a remodel, but that just makes the outcome even more satisfying.

Say hello to a brand new kitchen! Is this the same house? Oh yes, this is the same house you saw in the very first picture. It now has the Spazio LA touch.

kitchen island 4 (1)


I bet you never would have thought that we could the dark and sad kitchen into something as spectacular as this! This magazine worthy kitchen has everything off the must have list plus more.

new kitchen remodel

White cabinets and light floors make this room feel large, but the dark counters and pop of backsplash give a modern edge. Ecofriendly hard wood floors installed parallel throughout the space elongate the floor plan.

Our specialty is custom kitchens, and custom islands come natural for us. This custom island is well equipped with a built in microwave – say goodbye to a counter space thief! Built in range that will make any professional chef jealous, and seating for 3. I forgot to mention the outlets on either side of the island, just in case you want to throw a table lamp up there for ambience or need to plug in a crockpot during a family gathering. You will want to throw gatherings with a kitchen like this. The remodel makes organizing and utilizing space easy with custom cabinets and pantry – no more awkward spaces or flimsy shelves.

after 12

Every detail in this kitchen was done with special care, keeping one thing in mind: our clients dream. You give us your ideas and we make them become reality.

How to completely ROCK a Home Remodel

BBB-Logo.jpg

How to completely ROCK a  Home Remodel It is important to know that not all Home Remodel companies are created equal. Some professionals have been in the business longer, and others have a better reputation when it comes to completed work. Make sure you have the best team on your side to Rock your home remodel. Do your homework and make certain you have made the best choice before you sign a contract. I know that you are eager to hurry up and start so they can hurry up and finish, but take your time or else you may regret it in the end. For instance, there are plenty of stories detailing shady contractors being paid and not doing the work. Take Michigan home and business owners whom hired a company, paid the owner and received no work or refund.

"It is important to know that not all Home Remodel companies are created equal"

Horror stories these are, though we want to make sure you aren’t one to live a nightmare with this remodel or any project. Interview companies that you interested in, ask lots of questions and read their reviews. People tend to write reviews when they are really mad or really happy, having public reviews means you can see for yourself if their reputation is one to be proud of. Reviews will help guide you but here are a list of questions you need to be asking upfront.

Ask the right questions: 1. How long have you been in the kitchen and bathroom remodeling business? 2. How many projects like mine have you completed? 3. Who will be working on the project? 4. Are the other workers employees or subcontractors? 5. Can you provide me with references? 6. May I see a current job site? 7. Are you and your employees licensed and insured? 8. What license(s) do you have? 9. What other training and affiliations do you have? 10. How do you charge, and what does that include? 11. Can you give me a written estimate? 12. What do your services include? 13. How will I be charged for parts and materials? 14. When can this job get done? 15. What is your policy for change orders? 16. What happens when cost exceeds the budget? What about changes to materials or labor pricing? 17. What will I need to provide? 18. Are there any important considerations or concerns you foresee with this project?

Contact us today to get all your questions answered.

The WORST remodeling advice EVER

The WORST remodeling advice EVER Every great remodel started with a great plan, and if you don’t have one you are asking for disaster! If you want to fail at your remodel, we can give the best advice to lose money, waste time and get the worst imaginable remodel outcome.

Follow these steps to have your home remodel FAIL!

Below we have comprised the all-time top remodeling LIES!!!

1. Do not ever dream about this remodel, or look for inspirations. Ideas and inspirations are a no no. Steer clear of Pinterest and home décor magazines, these will give you dreams and ideas of a perfect remodel. Think of how you want remodel each room once you get to it, never plan before you start.

No plan = fail. You must have a plan and ideas of how you want your remodel to look before you start. Take all of your ideas and put them together in a binder or file so that you can get a better feel for what direction you want your remodel to go in. Write down all of the things you dream of and your partner, even if it is a spa bathroom or laundry room addition.

house ideas


2. Don’t set a budget. Checking to see how much money you have to actually spend on this project or need to finance is warned against. It doesn’t matter how much your home is worth, or the how much the homes around you are worth. Spend as much as you want on your home remodel, you will get it all back if you plan on selling anyways.

You must set a budget and figure out how much is too much to spend on this project. You can waste the most money by not using the money you have wise enough.

Bathroom-remodel-cost-calculator


3. DIY the whole remodel project. Contractors and professionals, who needs them? Everything can be done on your own, and may even cost you less money than anticipated, if you have the spare time to work after you get off your day job.

You can NOT DIY your whole home remodel. There are certain projects that you can DIY, but if you are not experienced you may waste money and time, and end up with a major fail. Check into local remodel companies and bring all your ideas to the tables.

4. If you do hire someone for help, give them all the money up front and just let them do the remodel without any contracts or guarantees. No need to check references or other completed projects of theirs, all remodel companies are created equal.

Do your homework! Not every contractor or professional remodel company is professional. A contract should be drawn up with deadlines and phases, contractors ask for a deposit but generally require full payment once completed.

5. If you need to get a loan, get the first loan you hear about. Quick money is the most important thing when looking for a remodel home loan.

Check what types of loans are available, interest rate and amount available. Do not settle for the first loan that offers quick money, they may cost you in the long run.

6. The most expensive materials and fixtures are the best way to go when you want to make money on your remodel. If your new kitchen is worth more than your neighbor’s kitchen, then your house will sell and make you tons in profit.

Expensive materials do not mean that you will make more money necessarily when you sell. There is a such thing as investing too much money on a remodel, and losing money when you sell. Be wise.


You can either do your remodel the right way or the wrong way. Get educated and think things through before you jump the gun. Remodel smart the first time.

Remodeling your house: Budget Wise

Remodel-Budget.jpg

Remodeling your house: Budget Wise The idea of remodeling may sound easy to most home owners, but remodeling the right way is a lot more complex. Adding square footage or remodeling existing rooms is a great way to increase the value of your home, though knowing how much money is too much or too little to invest isn’t easy. You can over spend on your projects and in the long run get money back to neither cover your investments nor be close to making any profit. If you do end up over improving you are running a gamble to find someone with the same taste as you and willing to spend what you are hoping to make.

Appraiser, John Bredemeyer, advises remodeling your home based off of the value of each room, based on the total value of your home.

See the following example based off a $500,000 home;

Kitchen 10%-20% home value: $50,000 – 100, 000 budget

Master Bathroom Suite 15% home value: $75,000 budget

Bathrooms 5% home value: $25,000 budget

Other rooms (living room, dining room, bedroom) 1%-3% home value: $5,000- 15,000 budget

Patio or Deck 2%-5% home value: $10,000-25,000 budget

You budget may vary depending on many factors like; size, addition or renovation, and cost of appliances and materials. Higher quality will cost more, but keep in mind the value of the room you are remodeling.


The top 3 remodeling projects that will add value to your home are:

1. Kitchen – Kitchens sell homes> Be careful to remodel smart because a $75K remodel may get you the same value as a $50K remodel, thus the importance of using the right company to represent you.

2. Bathroom - A bathroom can be remodeled for well under the cost of a kitchen remodel, but add the same kind of value. This is one room you don’t want to miss when you remodel.

3. Landscape & Hardscape – The outside of the home is the first impression of the rest of the house. If the outside is junky, this could cause you to lose value. Curb appeal is a real thing. Families these days are enjoying their homes and entertaining, a great outdoor space can increase the value of your home more than you think.

If you are planning this remodel project solely based off increasing your home’s value, you need to talk to a qualified remodeling company and consult with local home appraisers or real estate agents to make sure your remodel will meet your perspective goals. The homes around yours will affect your home’s value greatly, remodeled or not. Don’t be afraid to do your homework before your remodel. Contact us today to get a free in home consultation.

10 Best Holiday DIY for $50

10 Best DIY projects for under $50 There is nothing better than great DIY projects for the house. Here are a few of the best DIY projects for under $50.

1. DIY Macramé Curtain.  This easy curtain can be made with under $50 material and only a few hours’ time. This is perfect for sprucing up a closet that may be lacking a door, or a groovy entry way into a room.  Check out A Beautiful Mess for full instructions and tips on this Bohemian DIY Home décor.

diy remodel projects

2. Chevron Lamp Makeover. Got an ugly lamp shade? There is nothing a little tape and paint can’t fix. Take any old lamp shade and add paint for a new updated look. Try using tape as a guide for chevron stripes or design. Coco 29 did a great yellow chevron rendition.

remodel diy lamp

3. DIY Magnetic Knife Board. This space saver is great for those small kitchens that do not have ample counter space. By creating your very own magnetic knife board you get those knifes off the counter, and out of the reach of little hands. DIY Magnetic Knife Boards can be mounted anywhere, high or low, and can be tailored to any décor style.

diy magnet cutting board

4. DIY Closet Kit. I don’t know many people whom were born with the ability to keep their closet organized, but this DIY Closet Kit is perfect at helping those, and especially if you have kids. Find socks and underwear in little time, and possible even get rid of your old dresser that is taking up space. I personally love this idea and want one in the kids’ bedroom. Premade closet kits can cost you anywhere from $200+ dollars, make this one for $50.

closet kit diy

5. Concrete DIY Fire Pit. Perfect for those nights where a bon fire just is the right thing to do. The DIY Concrete Fire Pit can be made in only a few hours, and is ready to use when you are. Its sleek look will have every one asking where they can purchase one for themselves.

diy fire pit

6. Farmhouse Coffee Table DIY. Caution this table requires some pretty awesome power tools! It’s cool what a few scrap pieces of wood and some wheels can do for your living room. You can even skip the wheels if you have young kids that would turn this table into a sled, with or without the wheels it would make a great DIY Coffee Table.

coffee table diy

7. Staircase DIY Update. Get rid of the old carpeted staircase and in with the new sleek look. Demo, stain and paint, and you have a whole new house. Ok, you don’t have a whole new house, but you created a grand staircase with little effort.

stair case makeover

8. DIY Industrial Tables. Sometimes time is money. In this case this day project may not be for you, but it looks so cool. You can make end tables, or even a coffee table to match. This is for those whom love exposed brick and HVAC ducts, the Industrial lovers table this is.

end tables

9. DIY Wine Rack. This is super chic and adds a spark to any décor. The best part of this is DIY Wine Rack project is the fact that it looks expensive. Don’t purchase one from the store, build your own and have something to be proud of in your kitchen.

wine rack

10. Kids Room DIY Crate Seats. You can find these plastic baskets in most stores, and kids usually use them to stand on anyways. Why not turn them into cute seats for the kids room, heck possibly even the living room. Crates, foam, fabric and wood – there you have DIY Crate Seats.

crate seats

We love to see your completed DIY remodel projects. Comment with your best DIY to date and pictures.

DIY @ Home Coffee Bar

DIY @ Home Coffee Bar Are you among the majority of people whom start their day off with your morning dose of caffeine? Like many, I too start the day off with a coffee, whether it is hot or cold, it’s become my routine. Why not have my own coffee bar at home and save a few trips to the coffee shop? DIY Coffee bars are becoming a trend that you will want to be part off. Step up your plain coffee bar for a more elegant set up.coffee-apartment-therapy

Ample storage for your coffee mugs and supplies is important when planning your home coffee bar.

coffee bar remodel


coffee-bar

Try your hand at DIY and Upcycle an old microwave cart with a new coat of paint and wicker baskets to give your coffee bar new life. Don’t be afraid to scavenge local thrift stores for used furniture, a little sandpaper and paint never killed anyone.

coffee bar at home

The storage unit above this coffee bar is a pallet project that has been remade into a shelf, with added hooks to hang your coffee cups. The idea here is to be simple, yet creative and your coffee bar will never fail. With the right décor you won’t even need to repaint your coffee cart. Take this red coffee bar for instance, it has seen better days – but the cute décor and coffee theme draw your eyes away from the peeling paint.


You don’t need a large kitchen or large space to have a great coffee bar in your home. Try repurposing an old end table for you coffee bar. Hang artwork or floating shelves above the end table to add extra flair and make known that this is your coffee bar.home coffee bar

coffee

This vintage end table would be nothing without the décor and table lamp. Perfect example of how simple can be elegant! Stick a theme to your coffee bar and don’t forget about décor.

Your Holiday home remodeling Wish List

bg_holidayHeader.png

Your Holiday home remodeling Wish List  

Dear Santa,

This year I have been nice! A few things that I am asking for are:

Luxe Countertops- Marble or Granite may be pretty. I am in need of something fancy to impress all my friends, and last as long as I will. You can even throw in a luxe backsplash if you must.

Floors- I am thinking hardwood or bamboo. Bamboo is eco-friendly and looks great. I would be happy with Wood, Terra Cota, or Marble floors. Something that will give me a rich look and last as long as my countertops. I need a material that is easy to keep clean and doesn’t need a lot of maintenance.

Drawers instead of doors – The kitchen is in need of desperate organization, and I would love drawers instead of doors. This hidden feature makes the kitchen look sleek and the organization factor leaves a decluttered elegance. Extra deep drawers would be great for pots and pans, and all those baking dishes.

Light – I need windows everywhere! Bringing the light from outdoors will limit my electricity usage and make me feel larger. In place of cabinets in the kitchen I would like large windows. More light will allow my rooms to feel larger and more open, giving me the free space I have always wanted.

Pantry wall – Better make it a Pantry room. Since we will be removing cabinets for windows, we will need a pantry built to store all of our goods. A floor to ceiling pantry will be a great addition and organization tool.

Upgraded appliances – I’m talking double oven, 8 burner stove top, high power venting hood and separate full size refrigerator and freezer. These appliances will make life easier and enjoyable for all whom enter the kitchen. I mean, who doesn’t want a professional kitchen?

Curbless, glassless shower and spa soaking tub – No more glass to clean after every shower and the seamless look of a curbless shower has me in awe. Adding a spa soaking tub will not only kick the bathroom up a notch, but add that luxury retreat feel.

Radiant heated floors – I have heard it can be quite chilly on toes stepping out of the shower or bath; I need heated floors in the bathrooms this Holiday to make sure toes stay warm.

Walk in closets – Walk in closets are a must on my Holiday list. Clutter, clothing, shoes and items build up over the years , a deep walk in closet in every bedroom would be delightful.

I hope that I am on the Nice list this year, as my list is rather small. :)

Sincerely,

Your house


Mistakes to avoid in your Bathroom Remodel

bathroom-gray-blue.jpg

Mistakes to avoid in your Bathroom Remodel Some things are meant for other rooms in your house, rather than your bathroom. Don’t waste your well earned money on your next bathroom remodel. Avoid bathroom remodel mistakes by avoiding these materials or colors.

1. Wall to Wall Carpet

carpet-bathroom

Carpet is majorly discouraged by the Center for Disease Control and Prevention.  Yes this is one comfy flooring to rest your toes on after a long bath, but this material harbors mold, mildew and bacteria. Ultimately carpet in your bathroom is a health concern, more so than a decorating fail. 30 years ago this was a big trend in the remodeling industry, now we are more aware of the risks imposed by carpet in bathrooms. Skip the carpet and opt for a few bathroom throw rugs that can be washed and dries regularly. Tile flooring in bathrooms is a great surface to choose when remodeling your bathroom floor. Tile is easy to clean and disinfect, durable, there are a millions design and color options and will last as long as your bathroom.

2. Wall Paper

We all see the fancy bathrooms in the magazines that display lavish wall paper; fact of the matter is that any high moisture will cause the wall paper to peel eventually. Think about this, why use wall paper in a steamy room, when people use steam to remove old wall paper? Your bathroom produces the most moisture and steam in the whole house. If you must, absolutely must, have your bathroom wall papered – use a high quality, Vinyl wall paper. DO NOT attempt to use a peel and stick wall paper, this will be a waste of time and money. Peel and stick wall paper will bubble and peel within weeks if not days. Wall paper will last the longest in half bathrooms or bathrooms used less frequently.

cream-wallpaper-look-bathroom-tiles-700x476

3. Yellow paint

Avoid breaking out the Canary Yellow paint for your bathroom remodel, as this color is not a great choice for bathrooms. Yellow and yellow tones can make a bathroom look brash, and create a room that obscures your reflection. Ladies, note to self, don’t apply makeup in a yellow room. Choose colors that have a gray or blue tint to get that Spa like feel in your bathroom. Also consider the size of your room before picking a paint color. Darker colors are best suited for larger rooms, and light colors for small rooms.

bathroom-decorating-ideas-yellow-color-paint-tiles-22

Easy DIY Floating Shelves on a Budget

Astounding-Lowes-Wall-Mounted-Shelves-Decorating-Ideas-Images-in-Kitchen-Traditional-design-ideas-.jpg

Easy DIY Floating Shelves on a Budget shelves2

Holiday shopping is here, and you just had to wipe the drool of your face from admiring the Floating Shelve selection. The shelf was the only thing you admired because they price tag wasn’t so appealing. Here is your chance to DIY them yourself, save money and impress people with your handyman or woman, skills. It’s easy, fast and you will be more proud to show off these shelves than you will be to have admitted to spending $60 a shelf from the store. You will spend about $15 per shelf if you DIY this project! That is a killer savings if you ask me.

It’s as easy as 1.2.3

1. Build frames and attach to wall

2. Build frame enclosures

3. Paint or Stain your Shelves

Step 1: What you will need to do first is build your frame for each shelf before you install. This frame will consist of 4 pieces of Pine or Whitewood Board if you were to make them 32inches long; the piece that is going to be attached to the wall will need to be measured to the length where you will want these shelves to be installed or your desired length of choice. The three other pieces will act as your shelf supports, and be cut to the desired depth of the shelf, and attached to the 4th piece.

shelf

Approximately you want your supports every 10inches to make sure your shelf frame is sturdy.

Once you have your frame built, you will now move on to attaching these bad boys to the wall. Attaching these frames to your wall will require a stud finder and wood screws. Run your stud finder along the wall, once it beeps indicating a stud you will need to mark where your studs stand, now hold your frame to the wall and mark on your frame where the studs are. Once you have this done you need to predrill your holes, before attaching to the wall. Drill your frame directly into the wall and stud using the holes you predrilled.

Step 2: Measure a piece of ¼ inch plywood to the length and depth of the shelf frame. Once you have measured your plywood, attach the plywood to the bottom of the shelf.  You can attach this piece using Wood glue and Brad nails. Plywood can be used for this piece since you will not rely on this side of the shelf for support. In other words you aren’t going to set anything on the bottom of the shelf so using wood that is thin is acceptable. The top piece you will want to attach in the same manner as the bottom, a piece of 1X10 whitewood board, and each side will be 1X4 whitewood board all measured to size. Now that you have the frame enclosed your shelf should look like a shelf.

DIY-Floating-Shelves-How-To-500x750

Step 3: Paint or Stain your shelves. Be sure to tape off the wall before starting this final step, unless you want paint on your walls as well as the shelves.

DIY-Floating-Shelves-Tutorial-500x750


Floating shelves are so versatile you can add them to any room.

Graceful-Bedroom-Contemporary-design-ideas-for-Chunky-Floating-Shelves-Decorating-Ideas

floating shelf bar

Inexpensive, Unique and totally DIYable Backsplash

Inexpensive, Unique and totally DIYable Backsplash Who said your backsplash has to be expensive and boring? Get that idea out of your head and let your creative DIY side come to shine with these Kitchen Backsplash ideas. You can spend $1000 on your backsplash or you can spend as little as $60. The choice is yours, but be sure not to choose until you have read this article.

$60 Penny Backsplash: The texture, color and shine of the pennies create a visually interesting backsplash for your kitchen. Use the pennies in random combinations or create designs within the backsplash featuring different shades or sides of the pennies. You can achieve the look you want and save money by completing this project yourself over a weekend. You can achieve this look with Pennies, Clear Mosaic Mounting Sheets, Waterproof Tile Mastic, Waterproof Tile Grout and Sealant. This look takes patience, but is well worth it in the end. Check out this DIY Blog for Step by Step detailed instructions.

penny backsplash

Cork Backsplash: Well, if you are a wine lover you may have these piled up. However if you don’t happen to love wine you can purchase Cork off of Amazon for around $15 per 100 corks. For this DIY cork backsplash the corks were sawn in half and cemented to a backboard. Check out this amazing cork backsplash that used 800 corks, which means 1600 cork halves.

cork backsplash

Stone Backsplash: Home Depot and Lowes carry Peel and Stick Faux stone backsplash panels. Peel and stick panels are great for those who do not want to attempt grout and grout sealant. Measure your surface area before you attempt to start sticking away, you will need to pre-cut before starting. Local home improvement stores do carry panels of tile or stone that need to be grouted, take a close look at the label before you go home with the wrong stuff.

DIY-Cheap-Kitchen-Backsplash-Ideas24 home decor zielFlashing Backsplash: A very easy backsplash project that will cost you under $60, Aluminum Flashing. You can find Aluminum Flashing at almost every hardware store in an array of widths and finishes. Since the flashing is so thin and light weight you can directly adhere the flashing to the existing backsplash or wall and cut to size with a box cutter. Use an aluminum molding to tuck your edges in for a clean finishing edge. This project is fast, simple and budget friendly. Check out this transformation.

flashing backsplash

You don’t have to break the bank to get a great backsplash, just some creativity and time. Good luck to your future DIY kitchen backsplash.


Small bathrooms on Small budgets- Contractor Included

Small bathrooms on Small budgets- Contractor Included  

Congrats you are ready to redecorate and redesign your bathroom, very exciting!  But dropping $17,000 on a spa retreat is light years away from what you can afford to spend today? I’ve got good news for you: You don’t need mega-bucks to transform your bathroom into a relaxing escape. There are plenty of ways to renovate and redesign on a budget. Without having to skimp on a contractor!

According to Home Renovations Expert, Lee Wallander, the national average for a bathroom remodel is around $16,000 to $17,000 based on a 35-40 sq. ft. bathroom remodel.

Ok, now is your chance to admit it, you thought about doing this bathroom remodel as a DIY project? Its ok we all have thought about DIY to save money. Don’t go there, it’s not worth it. You will waste more time and money in the long run. There is a better way to utilize your small budget to renovate your small bathroom.

Finding ways to save money isn’t looking easy when you want Granite countertops and top notch fixtures, but it isn’t impossible. When countertop shopping for your bathroom remodel, avoid common colors such as tans and neutrals, these colors are higher priced as they are in demand. Opt for a broad range of colors, and encourage imperfections. Who wants imperfection? Imperfection equals lower priced granite countertops. Your sink will take up most of your countertop anyways, so no one but you will ever know you bought an imperfect piece.

Fixtures are an easy update and you can find inexpensive fixtures if you are shopper friendly. Compare lots of pries before you set sights on that perfect fixture. Craigslist and EBay can have hidden gems as well. Though, if you have the need to get your hands dirty we have the perfect DIY idea for you. Have paint handy? Want a DIY project for your bathroom remodel? Buy a good quality spray paint to give your fixtures a makeover and save money! This project will require patience, paint and drying time. Ensure that the fixtures have adequate drying time in between coats of paint so you don’t have peeling fixtures later on. This is a great way to salvage old fixtures without spending more than $20.

We wish we could DIY all of our bathroom remodel needs. Flooring is one area you don’t have to DIY, unless you want concrete floors, or to tile yourself, but you can save money (still using a contractor) if done the right way. If you are installing tile floors in your bathroom remodel, we can give you a few tips to save big money. When shopping for tile, look for sales on tile. Most stores have blow out sales to sell the last of their inventory. Check with your local store to compare prices. Some tile companies have left over tiles from jobs that they are willing to sell at ultra-low prices, snag those up if they are the right price. Remember that an overly done up bathroom will not make you anymore money in the long run, so sale items are ok. No one needs to know you are a smart shopper, but your mom, she will be proud!

These are just some of the ways you can save money when remodeling your small bathroom. For more ideas or help, contact us today.

Minus the Home Addition Mistakes

addition.jpg

Minus the Home Addition Mistakes There is no wrong way to do a Home Addition! Oh, yes, there are many ways to do a home addition wrong. Avoid having to tear down your Home Addition by following these top 5 simple rules.

contractor

1. Hiring the wrong Contractor or Remodel Company.

You will lose the most money and waste the most time if you do not pick a qualified contractor. You want to be sure the Company you hire has good references, including work completed on time, work completed to the clients standards and within budget. This is the time to ask questions and be sure you have the right crew to support you in this Home Addition.

2. DIY Home Addition.

Any large scale project involving home addition or remodeling your house should be done by a professional. Budget, permits, inspections, and everything else that comes with home additions should be left to someone well experienced in this field. DIY is not the only way you can bring your dream to life or save money, ask your contractor for money saving options or if you can do demo to save money.

3. Salvaging the wrong materials.

We understand that home improvements are not cheap. Saving money is ok, but salvaging the wrong materials will cost you more money in the long run. Salvaging materials will depend on the quality of the material and the damage caused to it after removal. If you are worried about being ecofriendly or saving money, try purchasing your building materials from a reclaimed wood yard or even checking for used light fixtures, cabinets, or shelving. If you are craigslist savvy you can check listings there, some people may have under gone a remodel and have good items you are looking for.reclaimed wood

4. Thinking of building without proper permits.

Building without the correct permit is never a good idea. You can suffer large fines and possibly have to tear down your addition. Your contractor should know the appropriate permits you will need and when to apply for them. If you have questions about building permits you can check with your local Building and Safety Department to get your questions answered.

a-look-at-the-budget

5. Not sticking to your budget.

This home addition isn’t going to be cheap, but you don’t need to go into debt to get it done. Have a set budget lined up before you start, and stick to it. Make your Home Remodel Company aware of your budget and how you will not have any room to increase this budget. Keep in mind that you may have to give up a special feature if something comes up in your project that eats at your budget.

Home addition doesn’t have to be a nightmare.  Let us help you increase your home’s resale value and improve your enjoyment. Contact us today!